BTW if you need to uninstall ASSP click here .
Following HOW TO upgrades ASSP V. 1.x to ASSP V. 2.x
- Requirements :
- You can upgrade to ASSP 2.x in any cPanel server with min. 4 GB RAM (recommended 6GB) and min. 2 CPU cores
- ASSP needs at least 2-3 GB disk space (used by /usr/local/assp folder) : be sure you have enough free space in your /usr partition.
- Be sure ASSP Deluxe for cPanel , ASSP WHM , and ASSP Deluxe frontend are updated to latest version.

Such as with ASSP v1 if you need to disable temporarly ASSP and return to cPanel/EXIM way you do not need to uninstall ASSP, you should simply stop it using this way.
Time required to complete ASSP v2 upgrade about 45 minutes.

If you have any problem upgrading ASSP v1 to ASSP v2 using following HOW TO you may contact support
HERE  . Or if you want use Grscripts professional upgrade service you may click here to order the Upgrade service . Upgrade service includes check of your current ASSP v1 installation, ASSP upgrade, firewall configuration, Razor and DCC plugin installation, BerkeleyDB setup, country blocking configuration based on your needs, ASSP DNS optimization, spambox installation if required.
Only if you have CSF firewall installed go to cPanel WHM  Plugins ConfigServer Security & Firewall and click Firewall Configuration.
Adds ,125,25,26,587,55553,55555,2703 to TCP_IN =
Adds ,25,26,587,55553,55555,2703 to TCP_OUT =
Adds ,6277,24441 to UDP_IN =
Adds ,6277,24441 to UDP_OUT =
Set DENY_IP_LIMIT = to 2000
Save Settings in CSF firewall and restart it.
Now disable and stop your ASSP using these steps .- Open
ASSP WHM INTERFACE and click
STOP. After some seconds you will receive following message shown in the image below

- Now click the link to fully disable ASSP. After pressing the link your ASSP will be fully stopped and disabled.

Ok now execute following commands to install ASSP v2 package
# chmod 444 /usr/local/assp/deluxe/upgrade2
# cd /usr/local/assp
# wget -O /usr/local/assp/assp.tar.gz http://www.grscripts.com/assp_2/assp.tar.gz
# tar xvzf assp.tar.gz;rm -f assp.tar.gz
# cd /usr/local/assp;rm -fr /usr/local/assp/images
# wget -O /usr/local/assp/package.tar.gz http://www.grscripts.com/assp_2/package.tar.gz
# tar xvzf package.tar.gz;rm -f package.tar.gz
Now you can install Perl for ASSP v2. ASSP 2.x requires a linux-thread-multi Perl and latest recommended Perl for ASSP v2 is 5.30.0 ; it will be installed in /usr/local/perls . You can remove this custom Perl location ( /usr/local/perls ) if you'll decide to uninstall ASSP. Execute following commands to install Perl 5.30.0 in /usr/local/perls now.
# cd /usr/local/perls;wget http://www.cpan.org/src/5.0/perl-5.30.0.tar.gz
# tar -xzf perl-5.30.0.tar.gz;cd perl-5.30.0
# ./Configure -des -Dusethreads -Dprefix=/usr/local/perls/perl-5.30.0
# make;make test;make install
# cd /usr/local/perls/;rm -f /usr/local/perls/perl-5.30.0.tar.gz
# chown -R root.root /usr/local/perls
Perl installation will require about 15-20 minutes , at the end of Perl installation execute following command to install ASSP Perl modules.
Perl module installation will require other 20-25 minutes, if it returns some Perl module errors you may ignore them for now. Once completed execute this
# /usr/local/cpanel/3rdparty/bin/php-cgi /usr/local/assp/deluxe/ex_localdomains.php force=yes
Only if you have more than one /home location (e.g. /home /home2 /home3) you must enter each home location (one location per row) by editing the file /usr/local/assp/deluxe/home . For example if you have /home /home2 and /home3 your /usr/local/assp/deluxe/home file must have this
home2
home3
Each time you change something in this file /usr/local/assp/deluxe/home you should execute ex_localdomains.php as shown below to load new accounts and new email in ASSP. ASSP Deluxe currently accepts max 4 home locations.
Plugins
Grscripts ASSP Deluxe, and click
Update ASSP Perl Modules as shown below

Once completed return to console and execute the command below to edit your cronjobs
You should have only following rows ( in the FAQs section you can learn what does these cronjobs )
*/59 * * * * /usr/local/cpanel/3rdparty/bin/php-cgi /usr/local/assp/deluxe/ex_localdomains.php
*/3 * * * * /usr/local/cpanel/3rdparty/bin/php-cgi /usr/local/assp/deluxe/update_email.php
*/3 * * * * /usr/local/cpanel/3rdparty/bin/php-cgi /usr/local/assp/deluxe/status.php
*/20 * * * * /usr/local/cpanel/3rdparty/bin/php-cgi /usr/local/assp/deluxe/find_abusers.php sw=29 rl=50 sc=30 dc=30 on=1
0 2 * * * /usr/local/cpanel/3rdparty/bin/php-cgi /usr/local/assp/deluxe/signatures.php
*/4 * * * * /usr/local/cpanel/3rdparty/bin/php-cgi /usr/local/assp/deluxe/spam_cronjob.php
30 1 * * * /usr/local/cpanel/3rdparty/bin/php-cgi /usr/local/assp/deluxe/clear_spambox.php
2 */6 * * * /usr/sbin/exiqgrep -o 33600 -i | /usr/bin/xargs /usr/sbin/exim -Mrm
MAILTO=root
Save cronjob list and exit.
Be sure to enter the rows MAILTO="" and MAILTO=root as shown above.
Every cron executed between MAILTO="" and MAILTO=root will not receive email cron notifications (each time the cron executes).  If you do not use MAILTO your email queue could be filled with email (email cron notification) generated by the crons above very fast !
Do not use > /dev/null since it will NOT work with these scripts.
Now execute this
Plugins
Grscripts ASSP Deluxe, and click
START ASSP as shown below

ASSP should start correctly and you should be able to see its activity in ASSP log using this way
SCORE SETTINGS and set PenaltyMessageLimit to
56 , Bayesian filter to
11 and HMM filter to
43 and save settings. These values are a good choice to start your ASSP v2 in the first days. After some week when your ASSP will build a robust HMM, Bayesian and whitelist dabatase you can reduce some point the PenaltyMessageLimit (more spam will be blocked).
Now go to console and execute this to install Razor and DCC automatically .
# /usr/local/cpanel/3rdparty/bin/php-cgi /usr/local/assp/deluxe/razor_dcc.php
Now a database must setup for ASSP v2. ASSP needs to store spam and notspam keywords and whitelist, and all this data must be processed fast. By default ASSP starts with a flat txt database which is strongly NOT recommended. By using ASSP Deluxe for cPanel you can setup in few easy steps a BerkeleyDB database ( recommended ) or a MySQL database . You can choose between one of these two solutions below, BerkeleyDB or MySQL.
BerkeleyDB ASSP Setup
Open your console and execute following command which will install BerkeleyDB 5.3.28 in /usr/local/BerkeleyDB.5.3 and the BerkeleyDB Perl module for your ASSP Perl
# /usr/local/cpanel/3rdparty/bin/php-cgi /usr/local/assp/deluxe/ex_localdomains.php
Open the ASSP WHM INTERFACE and click STOP ASSP. Once ASSP is fully stopped execute this to configure ASSP to use BerkeleyDB
Open the ASSP WHM INTERFACE and click START ASSP. Your ASSP should start correctly and you should see a new menu in your ASSP WHM INTERFACE as shown below.

MySQL ASSP Setup
If you prefer to use MySQL and you did NOT enable BerkeleyDB above you can setup MySQL for your ASSP using following way.
Open the WHM cPanel SQL Services MySQL/MariaDB Upgrade
and check your current MySQL version. You should have at least MySQL 5.7 or MariaDB 10.x . If you have an older MySQL version you should upgrade it . If an upgrade is not possible it's better to use the BerkeleyDB database using the BerkeleyDB HOW TO above.
Ok now open your MySQL /etc/my.cnf configuration file using your preferred console editor and add following rows required by ASSP to avoid MySQL disconnections ( add them at the end of [mysqld] section )
wait_timeout=28800
Save the file and restart MySQL in this way
Now open the ASSP WHM INTERFACE and click MYSQL SETUP and follow simple instructions to activate MySQL.
Once MySQL has been setup return to ASSP WHM INTERFACE and you should see a new menu as shown below.

Final steps
Upgrade is almost complete, at this point your ASSP should be running correctly with SSL, database, spambox (if you installed it in ASSP v1) and preconfigured with moderate antispam settings. There are few more simple steps required to run your ASSP at the best.
Open the ASSP WHM INTERFACE , go to "ASSP 2.x core settings" and choose number of SMTP workers following the instructions. 5 is default and should be good in most cases . You can increase or reduce based on your server RAM and SMTP traffic . If you receive a lot of SMTP traffic you may consider a bigger value (8-12 e.g.). A value above 15 is not recommended. If your server has less than 8 GB RAM set to 3 max 5 workers. Remember that more workers means more SMTP processing speed, so if your users are experiencing delay to send email you should try to increase number of ASSP worker one step at time. Each time you change number of workers ASSP needs to execute a restart.

Open the ASSP WHM INTERFACE , go to "ASSP 2.x core settings" and click enable PYZOR and ANTIVIRUS CHECKS . Pyzor checks will improve antispam performance while ANTIVIRUS CHECKS permits to scan also compressed email attachments.
Pyzor requires at least Python version 2.7.5 if you have an old OS (Centos 6 e.g.) Pyzor could not work.

After enabling Pyzor and Antivirus execute this to activate immediately the new features (ASSP will be restarted to load the new feature)
Finally it's time to open the ASSP GUI to set ASSP GUI password and activate DCC and Razor plugins. Go to ASSP WHM INTERFACE and click ASSP WEB INTERFACE . Your ASSP WEB INTERFACE (GUI) should open you can login with..
password : your ASSP v1 password
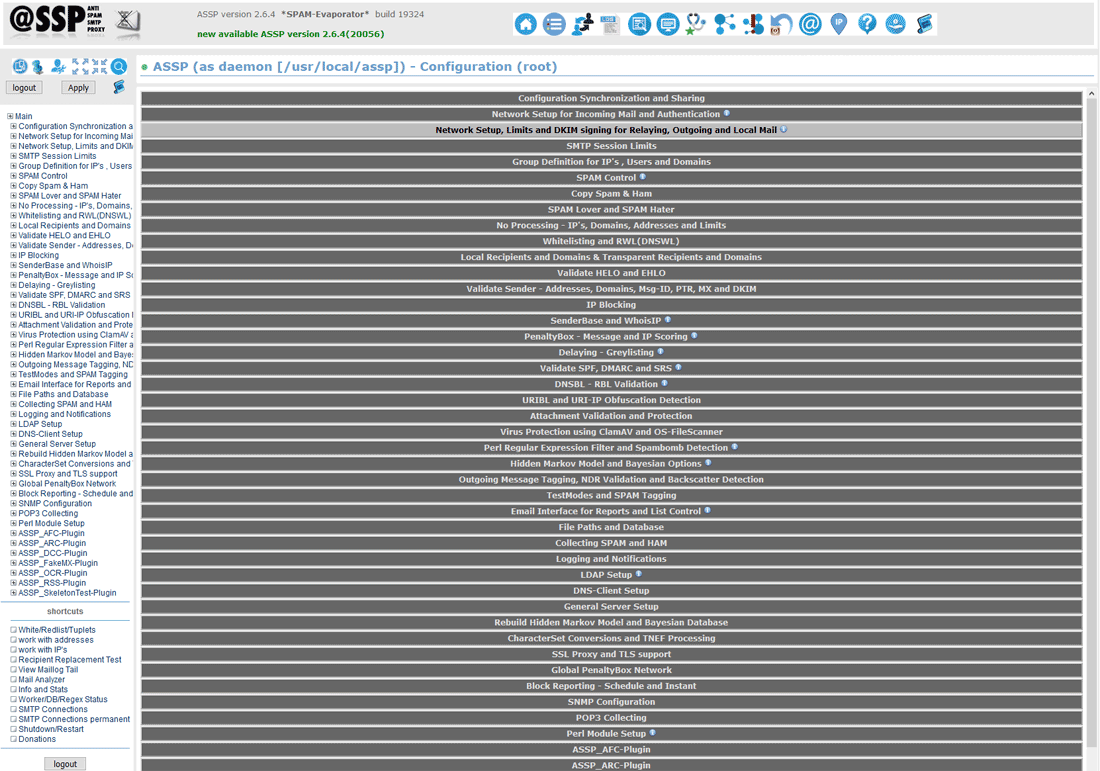
No panic, there are countless settings here in ASSP v2 but it's everything preconfigured by ASSP Deluxe for cPanel installation; if needed you'll learn to use it day by day. You can find here ASSP core settings which are better you do not change ( for example SSL settings which are controlled using ASSP SSL MENU, database settings controlled using ASSP WHM interface, Score/Penalty Box settings , and some other core settings) and ASSP antispam settings which probably you may use often, for example the "Whitelist" menu, The "validate sender" menu, The "Perl Regular Expression Filter and Spambomb Detection" and some other. All ASSP GUI settings are saved in /usr/local/assp/assp.cfg (ASSP configuration file) . You should never edit manually this file, this file contains also crypted data , so you may risk to mess up your ASSP, always use the ASSP Web interface if you want change an ASSP setting. A backup of your configuration file /usr/local/assp/assp.cfg is saved daily in /usr/local/assp/backup_cfg , so if after doing some change in ASSP GUI your ASSP stops to work correctly , STOP your ASSP using the ASSP WHM INTERFACE , restore a working assp.cfg file from /usr/local/assp/backup_cfg to /usr/local/assp/assp.cfg and START ASSP again . You can also backup all the folder /usr/local/assp ( for example in /usr/local/assp_backup) and restore it in case your ASSP stops to working correctly after making a wrong setting in ASSP GUI or other issues.
note : there are various ASSP web interface parameters which are controlled by ASSP Deluxe for cPanel. All parameters controlled by ASSP Deluxe are listed in ASSP WHM INTERFACE AUTOMATION SETTINGS . If you are an experienced ASSP administrator and you want customize some of these parameters you should set OFF the parameter you want customize in AUTOMATION SETTINGS page.
Now, to complete the ASSP v2 upgrade I recommend you to take only a fast look to your ASSP GUI and to apply following final few steps. First of all your ASSP should appear like this below, you should see a green dot, which means all ASSP DBs are working correctly. If you see a red dot , close the ASSP GUI, STOP and START your ASSP using ASSP WHM INTERFACE , then open again the ASSP GUI .If the problem does not fix you should have failed the database installation some step above.

Now open the ASSP Razor Plugin menu and set DoASSP_Razor to score, then open the ASSP DCC Plugin menu and set DoASSP_DCC to score.
Ok you can SAVE/APPLY ASSP settings in your ASSP GUI. You can close the ASSP WEB INTERFACE now.

Ok... ASSP v2 upgrade is completed and all should work correctly . All incoming email should be filtered and everything should work correctly. Now you can check the Post installation steps and FAQs page. You can learn how to STOP fully ASSP and return instantly to cPanel only , how to restart ASSP from console, and other important user and administrative tasks.
If you failed the ASSP upgrade, disable your ASSP and order Grscript professional upgrade service by clicking here . Upgrade service includes check of your current ASSP v1 installation, ASSP upgrade, firewall configuration, Razor and DCC plugin installation, BerkeleyDB setup, country blocking configuration based on your needs, ASSP DNS optimization, spambox installation if required.